From Theater Room to Dream Bedroom
This post is long overdue!! I could easily just leave this off the blog but we have done so much to our home and I have documented everything I wanted to share the transformations with you! You might have seen a few updates on my Instagram account follow me here if you would like! I’m on there pretty much every day.
When we first bought this house in 2017 it was only a 2 bedroom. You can read our moving post here. NOW it is a 3 bedroom with a loft!
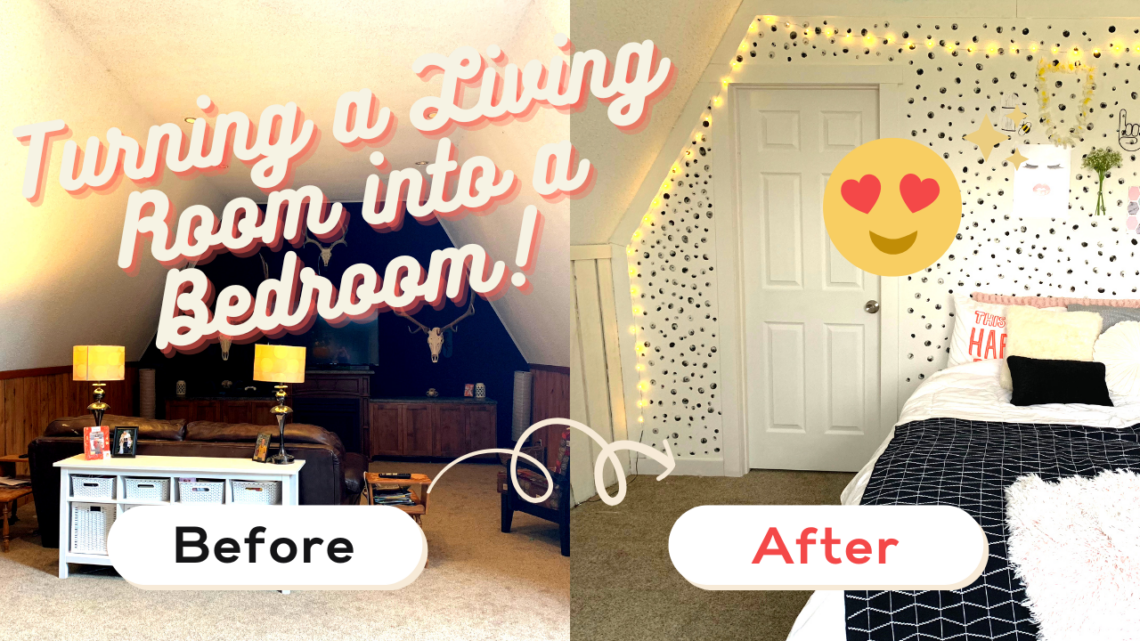
We officially tackled our biggest layout change to make that happen: turning our old, dark TV theater room into a bright, beautiful bedroom for our daughter. Check out the full transformation video below to see how it went down, and read on for the step-by-step breakdown!
The Before: A Dark Media Room
Every house has its quirks, and this room had a major one. The previous owners used it as a dedicated home theater room. The walls were covered in a heavy, dark theater fabric, and the wiring was running right along the floor instead of hidden inside the walls.
The room also had a massive, completely opening leading straight into the living room, and a solid back wall with an old gas fireplace setup and propane tanks outside. A space with beautiful potential had absolutely zero privacy and zero natural light!
Our mission was clear: tear off the fabric, open up the back wall for a view, and completely close off the living room opening to turn it into a private, functional bedroom. This was actually our very first big project on the house, so we were incredibly excited to get started and see what we could do with the space!
Step 1: Framing and a Million-Dollar View
Once the project officially kicked off, our contractor got straight to work on the most exciting part of the transformation: cutting a hole right through the solid exterior wall.
Removing the old fireplace and putting in a massive new window completely changed the energy of the space. Now, our daughter gets a gorgeous, lush green view of the backyard in the summer, and a perfect, unobstructed view of the lake during the winter. Talk about a lucky girl!
At the same time, it was time to address that massive opening to the living room. Because the opening was already there, framing the new bedroom wall, adding the entry door, and getting the room completely closed off went surprisingly fast.
Step 2: Utilizing the 12-Foot Ceilings & Roughing-In
One of the absolute best features of this room is the incredible 12-foot ceilings. We really wanted to maximize that height rather than letting it go to waste!
To do that, we framed the new walk-in closet down at 8 feet. By doing that, we created an awesome, built-in bonus space: a small loft area right above the closet! We built it with full structural support, making it completely safe if the kids want to climb up there and use it as a cozy, fun hangout nook.
While the walls were open, we also tackled a few electrical surprises. Because the old theater wiring was exposed along the floor, we had to run entirely new lines through the studs for the outlets, wall switches, and new closet lighting.
Step 3: Drywall, Texture, and Trim
With the framing and electrical out of the way, it was time for drywall day!
Because the original back wall was a total mess after removing the theater fabric and cutting out the window, the crew re-drywalled the entire back surface to give us a perfectly smooth start. After the sheets were hung, they applied the mud, taped the seams, and finished it off with a clean texture coat to match the rest of the house.
Next up came the finish carpentry—installing the baseboards, framing out the new window trim, and hanging the new bedroom and closet doors.
Step 4: The Finishing Touches (and a $30 Steal!)
With the drywall dry and the trim up, we grabbed our rollers and got to painting. We went with a bright, clean color to bounce all that new natural light around the room.
Pro Tip on Painting Trim: If you are painting over raw wood trim, keep an eye out for bleeding. The natural oils in the wood bled through our first layer (just like it did in our bathroom remodel!), so we had to prep for a solid second coat to get that crisp, clean finish.
For the walk-in closet organization, we managed to score a massive set of storage racks secondhand for only $30! It was an absolute steal and gave her tons of instant storage.
The Final Reveal
After weeks of dust, framing, and hard work, the room is officially done! We brought in her bed, mounted the TV on the main wall, and she was able to spend her very first night in her brand-new room.
Going from a dark, wide-open media room to a private, sun-drenched bedroom with a custom loft and a lake view has been incredibly rewarding. For our first major home project, it completely changed how our home functions for our family.
What do you think of the transformation and that fun closet loft? Let me know in the comments below, and don’t forget to subscribe to our channel for the next home improvement project!

Related posts:


Kristin McConnell
Hi!! I’m Kristin, the heart behind Live Simply with Kristin. As newly empty-nest empty nesters, Ryan and I sold it all and live full-time in our cozy camper—trading big house stress for simple joys, freedom, and adventures together. Here, I share wholesome recipes that fit tiny spaces, fitness tips to stay strong on the go, small-space living hacks, and the beauty of intentional, less-is-more living. Grateful you're along for the ride—let's keep it simple and joyful! 🩷 ✝️


You May Also Like

No, Spend February

Blueberry Yogurt Oat Cookies