How to Hatch Eggs with a Broody Hen
A broody hen is an ideal way to hatch eggs and raise baby chicks naturally. Your hen will do all the work for you!
Raising chickens is a rewarding journey, and one of the most exciting parts is hatching your own chicks! In my previous blog post, “Baby Chicks Hatch: Our First Hatching”, I shared the joy of our first successful hatch using a broody hen. Today, I’m diving into the step-by-step process of hatching eggs with a broody hen, a natural and low-maintenance method for growing your flock.
Whether you’re a beginner or a seasoned chicken keeper, this post will help you navigate the process with confidence.
What is a Broody Hen?
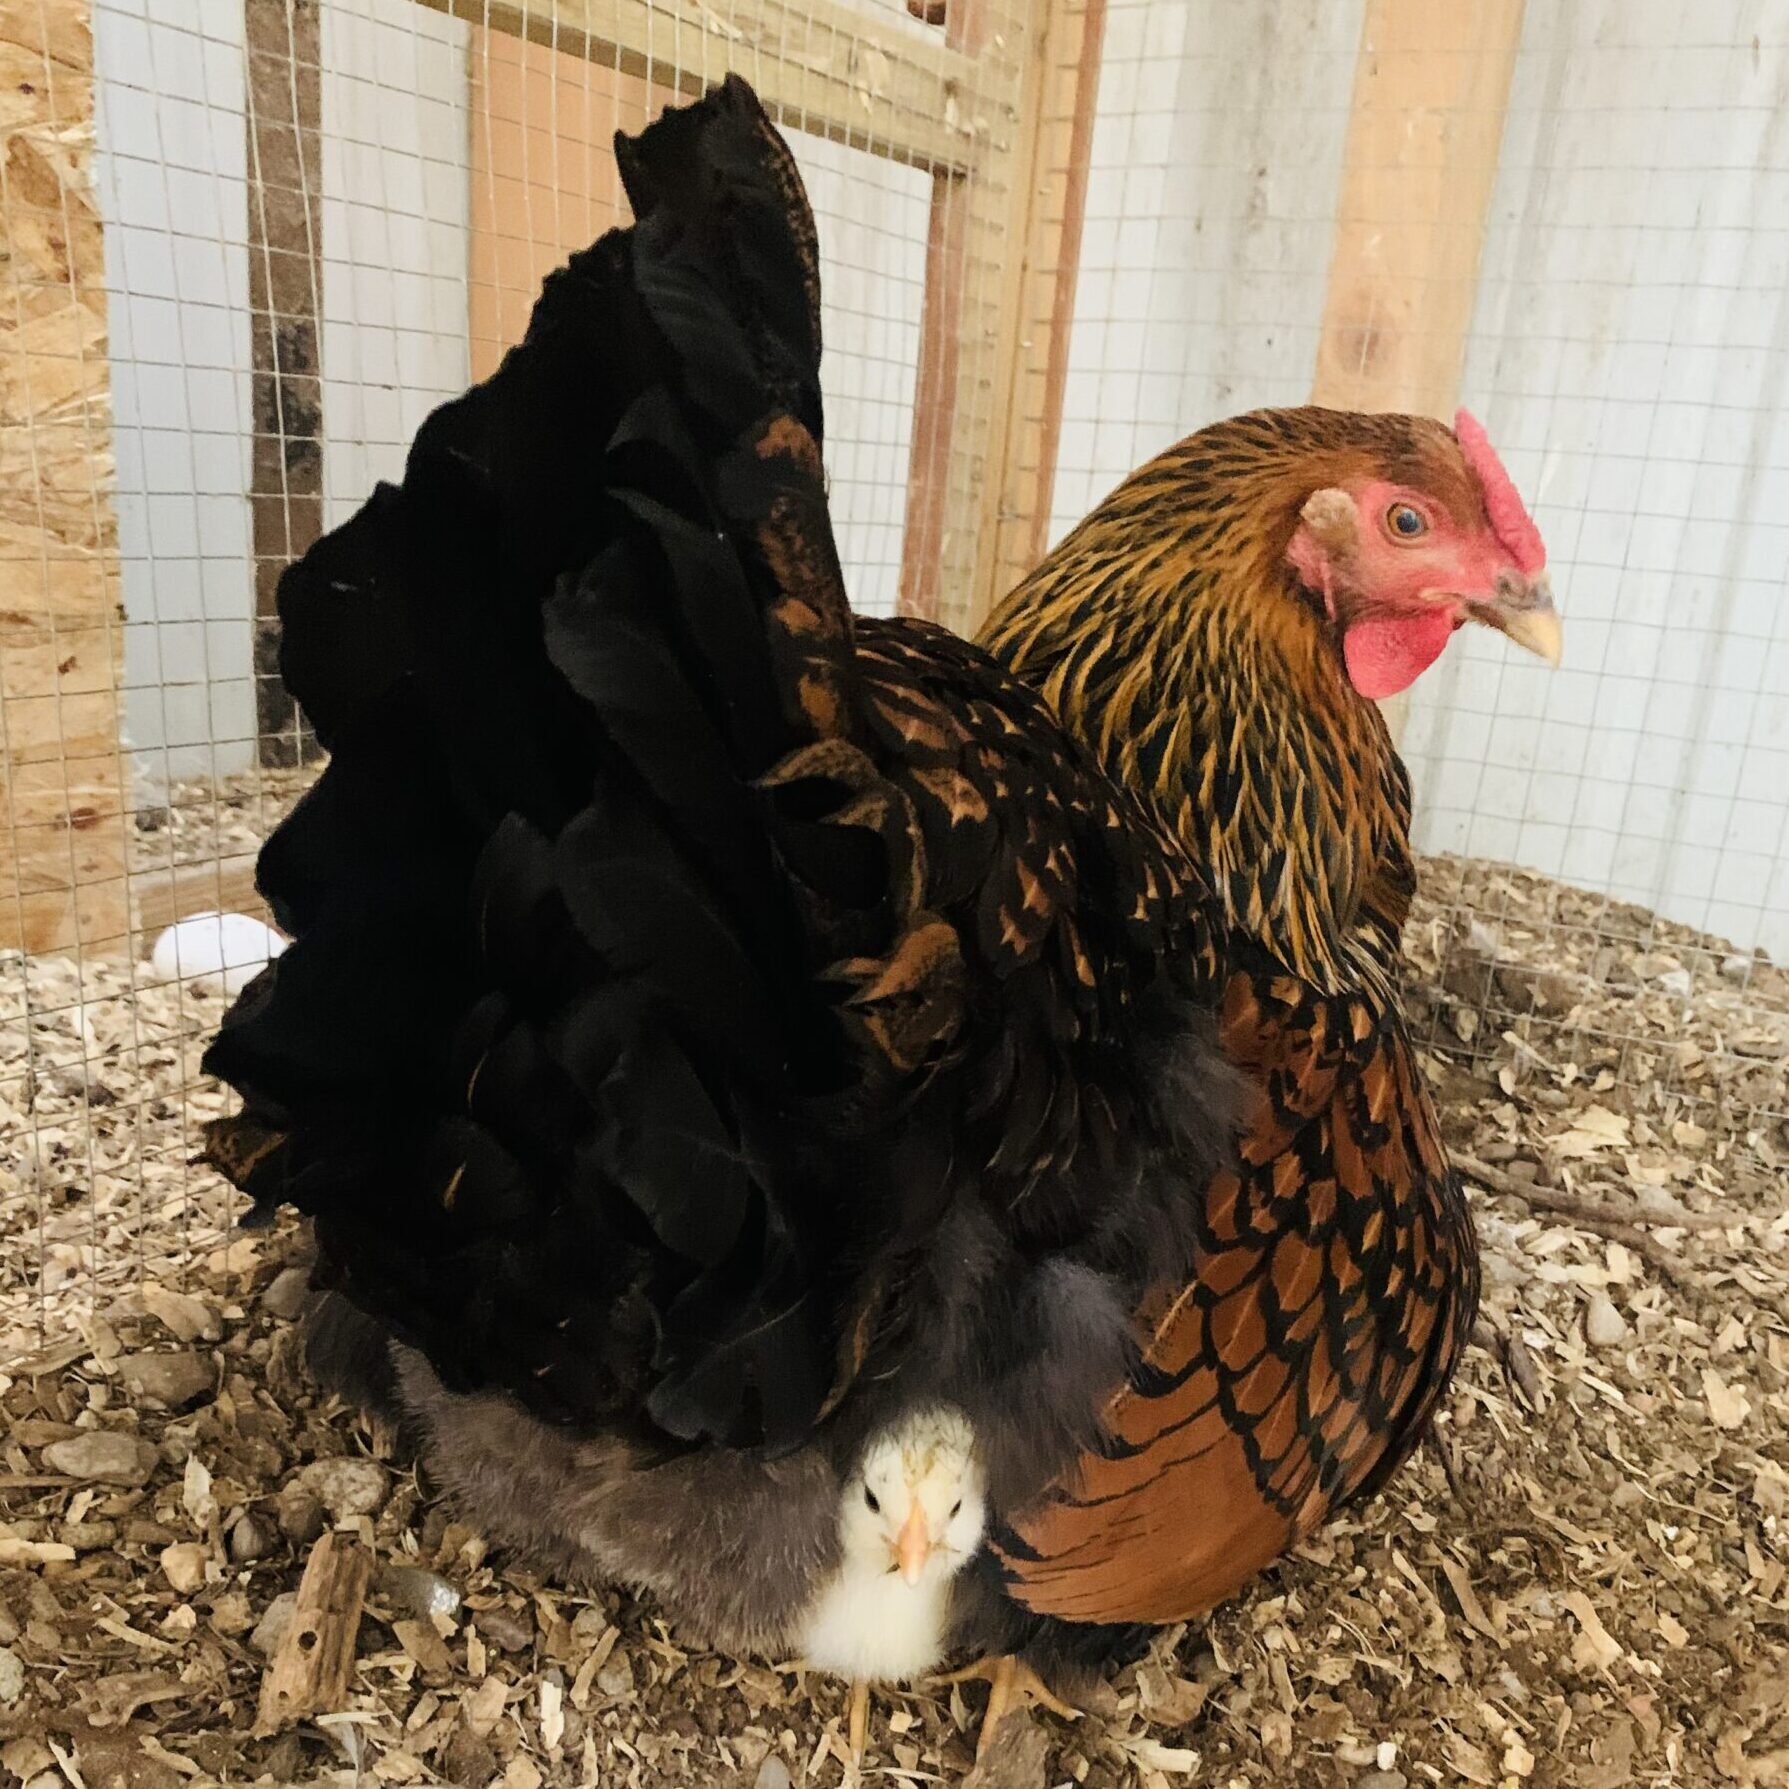
A broody hen is a hen that’s ready to sit on eggs and hatch them. She’ll exhibit behaviors like staying on the nest for extended periods, puffing up her feathers, clucking softly, and sometimes becoming a bit defensive when approached. Her maternal instincts kick in, making her the perfect natural incubator for fertile eggs.
Step 1: Identify a Broody Hen
Before you start, you need a hen that’s truly broody. Here’s how to spot one:
- Nest Obsession: She refuses to leave the nest, even at night.
- Feather Fluffing: She puffs up and may peck or growl if you try to move her. (see reel below!!)
- Physical Changes: Her comb may shrink slightly, and she’ll eat and drink less.
Or another easy way to see if you have a broody hen, watch this reel!
Some breeds, like Silkies, Orpingtons, and Cochins, are more prone to broodiness. In our first hatching experience, as shared in my earlier post, our broody Golden Laced Wyandotte was a natural at the job!
Step 2: Prepare a Safe Nesting Space
Once you’ve confirmed your hen is broody, set up a quiet, safe, and comfortable nesting area:
- Separate Space: Move her to a private area, like a small coop or a partitioned section of your existing coop, to prevent other hens from disturbing her or laying additional eggs in her nest.
- Tip: Move her at night, it will be easier and she won’t fight you about moving!
- Comfortable Nest: Provide a nest box with soft bedding, like straw or wood shavings. Ensure it’s low to the ground for easy access.
- Food and Water: Place food and water nearby. Broody hens rarely leave the nest, so make it easy for her to stay hydrated and nourished.
Lacy, my Golden Laced Wyandotte, found a cozy place on the ground between the coop wall and the brooder I already had set up. The other hens left her alone, so I didn’t move her until after the chicks were born!
Do what feels best and right for you and your hens.
Step 3: Choose Fertile Eggs
You’ll need fertile eggs for hatching if you don’t have a rooster.
Here’s what to consider:
- Source: Obtain eggs from a reputable breeder or your own rooster if you have one. Ensure the eggs are no more than 10 days old for the best hatch rate.
- Quantity: A standard-size hen can typically cover 8-12 eggs, while smaller breeds like bantams may handle 6-8. Don’t overload her, as this can reduce hatch success.
- Check Quality: Select clean, uncracked eggs with smooth shells. Avoid oversized or oddly shaped eggs.
Step 4: Place Eggs Under the Hen
Once your hen is settled in her nesting area, gently place the fertile eggs under her:
- Timing: Move eggs at night when the hen is calm to minimize stress.
- Mark Eggs: Use a pencil to mark the eggs with the date so you can track them and remove any non-fertile eggs added by other hens.
- Check Acceptance: Ensure the hen tucks the eggs under her body. Most broody hens will accept eggs immediately.
Step 5: Support Your Broody Hen
For the next 21 days, your hen will do most of the work, but you’ll need to support her:
- Minimize Disturbance: Keep the area quiet and limit handling to avoid stressing her.
- Daily Checks: Gently check that she’s eating and drinking. Some hens need encouragement to leave the nest briefly each day.
- Candling (Optional): Around day 7-10, you can candle the eggs to check for embryo development. Remove any that aren’t developing to prevent spoilage.
Step 6: Prepare for Hatch Day
Around day 21, get ready for the big moment:
- Leave Her Alone: Let the hen manage the hatch. Avoid interfering unless a chick is clearly struggling and needs help after 24 hours.
- Post-Hatch Care: Once the chicks hatch, ensure they have access to chick starter feed and water. The hen will keep them warm and teach them to eat.
In our first hatching experience, watching the chicks emerge under their mama hen was magical.

Step 7: Transition to the Flock
After a few days, the hen will start leading her chicks out of the nest. Here’s how to help:
- Safe Space: Provide a low-sided box or area where chicks can follow their mom without escaping or getting hurt.
- Integration: Gradually introduce the hen and chicks to the flock after 4-6 weeks, once the chicks are stronger. Monitor for bullying from other hens.
- Weaning: The hen will naturally wean the chicks around 6-8 weeks, though some may take longer.
Tips for Success
- Patience is Key: Let nature take its course. Broody hens are experts at hatching if given the right conditions.
- Monitor Health: Keep an eye on both the hen and chicks for signs of illness or distress.
Why Choose a Broody Hen?
Hatching eggs with a broody hen is cost-effective, natural, and incredibly rewarding. Unlike an incubator, a hen regulates temperature, humidity, and egg-turning herself, and she’ll raise the chicks with minimal effort from you. Plus, watching a hen nurture her babies is a heartwarming experience that deepens your connection to your flock. If you’re ready to try hatching eggs with a broody hen, I hope this post helps you get off to a successful start! For more details on what to expect, check out my post on our first hatching adventure.
Have you hatched eggs with a broody hen before? Share your tips or questions in the comments below!
Happy hatching!

Related posts:

Kristin McConnell
Hi!! I’m Kristin, the heart behind Live Simply with Kristin. As newly empty-nest empty nesters, Ryan and I sold it all and live full-time in our cozy camper—trading big house stress for simple joys, freedom, and adventures together. Here, I share wholesome recipes that fit tiny spaces, fitness tips to stay strong on the go, small-space living hacks, and the beauty of intentional, less-is-more living. Grateful you're along for the ride—let's keep it simple and joyful! 🩷 ✝️